
In This Article
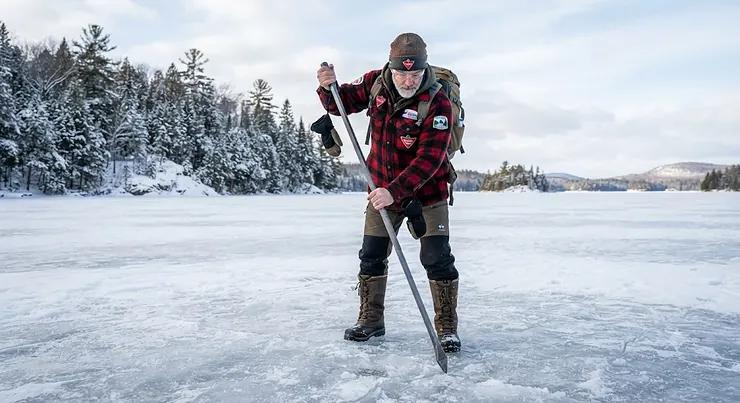
Here’s the thing nobody tells you before your first solo trip onto early-season ice: the lake doesn’t care how badly you want to fish it. An ice spud bar is a long steel pole, either one piece or telescoping into two, that you swing ahead of your boots to chip and probe frozen water so you know its thickness before you trust it with your weight. Learning how to use ice spud bar techniques properly is less about brute force and more about rhythm, patience, and reading what the ice tells you with every strike. If you grew up around a Canadian lake, you’ve probably seen an uncle or a neighbour tap-tap-tapping their way across a frozen bay before anyone else was allowed to follow. That’s not superstition. That’s the oldest, cheapest, and arguably still the most reliable ice-safety tool ever made, and it costs less than a tank of gas.
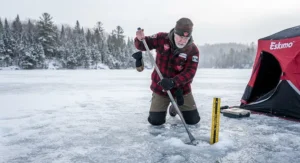
This guide walks you through exactly how to use ice spud bar tools step by step, the ice thickness testing guide numbers that actually matter, and the safe ice checking habits that separate a good ice season from a very bad news story. As the Canadian Red Cross puts it plainly, there’s no such thing as 100 percent safe ice — only better-informed decisions about the ice you’re standing on. We’ll also compare seven real spud bars sold across Canada right now, from bare-bones economy models to heavy chipper-head units built for breaking through gnarly refrozen slush. Every angler, cross-country skater, and ice-hut hauler in this country has a stake in getting this right, so let’s get into it.
Quick Comparison Table
Before the deep dive, here’s a fast snapshot of how these seven picks stack up by category. Every one of them handles the core job — probing and chipping — but each leans toward a slightly different kind of ice season.
| Category | Product | Length | Best For |
|---|---|---|---|
| Best Overall | Rapala 62″ Two-Piece Chisel | 62″ (157 cm) | Balanced weight and reach for most anglers |
| Best Budget | Eskimo CH7 Economy Chisel | 52.5″ (133 cm) | First-time buyers on a tight budget |
| Best Chipping Power | Eskimo CH12 Triple-Action Chipper | 64″ (163 cm) | Breaking refrozen slush and thick early ice |
| Best for Packing | Jiffy Deluxe Mille Lacs Chisel | 52″ (132 cm) | Snowmobile and sled-pulled trips |
| Best Compact Backup | Jiffy 3541 Mini Mille Lacs | 30″ (76 cm) | Kids, backup tool, tight ice shacks |
Looking at this table, the pattern is pretty clear: length and chipping design trade off against portability. The Rapala 62″ Two-Piece Chisel lands in the sweet spot because it breaks down for the truck ride but still gives you enough reach to test ice several strides ahead without crouching. If you’re hauling gear on a sled behind a snowmobile, though, the shorter packable options edge it out simply because every extra inch of pole is one more thing snagging on your gear bag.
💬 Just one click — help others make better buying decisions too!😊
Top 7 Ice Spud Bars: Expert Analysis
Here’s the full breakdown of all seven picks, including the specs that actually change how a spud bar performs on the ice, not just how it looks on a shelf.
| # | Product | Length | Design | Approx. Weight | Price Range (CAD) | Best For |
|---|---|---|---|---|---|---|
| 1 | Eskimo CH12 Triple-Action Chipper | 64″ (163 cm) | Two-piece, multi-faceted head | ~10 lbs (4.5 kg) | C$70–C$100 | Heavy chipping, thick early ice |
| 2 | Jiffy Deluxe Mille Lacs Chisel | 52″ (132 cm) | Two-piece, stepped steel blade | ~10 lbs (4.5 kg) | C$90–C$130 | Serious ice anglers who want durability |
| 3 | Rapala 62″ Two-Piece Chisel | 62″ (157 cm) | Two-piece, screw-collar joint | ~5.7 lbs (2.6 kg) | C$45–C$65 | All-around use, easy transport |
| 4 | HT Enterprises HTIC-1 | 54″ (137 cm) | One-piece, tempered steel head | ~5–6 lbs (2.3–2.7 kg) | C$35–C$55 | No-assembly simplicity |
| 5 | Thunderbay Heavy Duty Steel Chisel | 64″ (163 cm) | Two-piece, alloy steel | ~8.1 lbs (3.7 kg) | C$30–C$45 | Budget-conscious two-piece option |
| 6 | Eskimo CH7 Economy Chisel | 52.5″ (133 cm) | One-piece, single-action head | Lightweight alloy | C$25–C$40 | Entry-level, casual outings |
| 7 | Jiffy 3541 Mini Mille Lacs | 30″ (76 cm) | One-piece, compact steel | ~3 lbs (1.4 kg) | C$25–C$35 | Backup tool, kids, tight spaces |
The spread here tells its own story: the Eskimo CH12 Triple-Action Chipper and Jiffy Deluxe Mille Lacs Chisel justify their higher price with genuinely tougher steel and blade geometry built to punch through the kind of grey, slush-refrozen ice that shrugs off cheaper tools. On the other end, the Eskimo CH7 Economy Chisel and Jiffy 3541 Mini Mille Lacs aren’t lesser products so much as purpose-built for lighter-duty testing, where a lighter, cheaper bar means less arm fatigue on a long walk. Weight matters more than most buyers expect, since you’re swinging this thing dozens of times per outing.
✨ Ready to gear up before first ice? Tap any highlighted pick above to check current availability on Amazon.ca — prices and stock shift fast once the cold snap hits.
1. Eskimo CH12 Triple-Action Chipper — best for punching through slush ice
The multi-faceted head on the Eskimo CH12 Triple-Action Chipper is the standout feature here, cutting on three angles instead of one flat edge. At 64 inches and roughly 10 pounds, this two-piece chisel hits with real authority — the alloy steel head is wide enough that a single confident swing tells you more than three weak taps from a lighter bar. Based on the spec comparison, this is the pick for anglers working lakes known for wind-packed slush layers or that grey, honeycombed ice that forms after a mid-winter thaw, since a triple-faceted edge bites into uneven ice far more reliably than a single bevel. Reviewers consistently report that the foam-grip two-piece handle holds up well through a full season, though a few note the extra weight is noticeable on long walks compared to single-action designs. What most buyers overlook about this model is that its chipping power doubles as hole-maintenance duty later in the season, clearing slush buildup around an auger hole without needing a separate tool.
Pros:
- ✅ Multi-faceted head bites into uneven or slush-refrozen ice
- ✅ Two-piece design packs down for truck or sled storage
- ✅ Doubles as a hole-clearing tool later in the season
Cons:
- ❌ Heavier swing weight than single-action economy chisels
- ❌ Premium price compared to basic one-piece models
At around C$70–C$100, the value verdict is straightforward: pay more if your local ice regularly forms rough or layered, and you’ll appreciate the extra chipping authority every single trip out.
2. Jiffy Deluxe Mille Lacs Chisel — best for anglers who want a bar built to outlast them
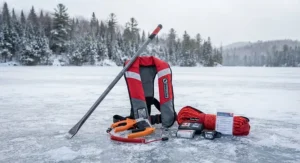
The stepped, faceted steel blade on the Jiffy Deluxe Mille Lacs Chisel is the standout feature, designed to shed ice chips outward instead of packing them back into the hole you’re cutting. At 52 inches with a two-piece packable build, this chisel weighs in around 10 pounds of genuinely heavy steel, and Jiffy has built ice-drilling gear for the North American market for decades, which shows in the fit and finish. Here’s what to weigh: the shorter length compared to the 62–64 inch bars on this list means slightly more crouching on thick ice, but the tradeoff is a noticeably stiffer, less flexy pole when you’re chipping aggressively. Aggregated reviewer sentiment across ice-fishing retail sites consistently praises the blade’s edge retention over multiple seasons, with fewer complaints about re-sharpening compared to cheaper alloy heads. The spec sheet won’t tell you this, but user reports suggest the two-piece joint stays tight even after repeated freeze-thaw cycles in a truck bed, which is a common failure point on lesser two-piece designs.
Pros:
- ✅ Stepped blade design sheds ice chips efficiently
- ✅ Heavy-gauge steel holds an edge across multiple seasons
- ✅ Packable two-piece joint stays tight over time
Cons:
- ❌ Shorter reach than the longer 62–64 inch options
- ❌ Among the pricier picks in this roundup
In the C$90–C$130 range, this is the buy for anglers who fish 20-plus days a season and want gear that won’t need replacing every winter.
3. Rapala 62″ Two-Piece Chisel — best balance of reach, weight, and portability
The 62-inch reach on the Rapala 62″ Two-Piece Chisel is the standout feature, giving you an extra probing distance ahead of your boots without the bulk of the longer chipper-style heads. Key specs interpreted: at roughly 5.7 pounds with a screw-collar two-piece joint, this is noticeably lighter than the chipper-head models on this list, which matters when you’re testing ice for twenty minutes straight rather than just cutting a single hole. Based on the spec comparison, Rapala’s known engineering pedigree in fishing tools translates well here — the balance point sits closer to your hands than bulkier designs, reducing wrist fatigue on a long walk out. Reviewers consistently note the screw-collar joint as the main differentiator versus cheaper spring-pin two-piece designs, since it resists the wobble that develops in pin-style joints after a season of hard chipping. A common theme in aggregated feedback is that this chisel handles general-purpose testing and light hole-clearing well, though it’s not marketed as a heavy chipper for thick slush ice.
Pros:
- ✅ Long 62-inch reach without excessive weight
- ✅ Screw-collar joint resists wobble over time
- ✅ Lighter swing weight reduces arm fatigue on long tests
Cons:
- ❌ Less aggressive chipping power than triple-action heads
- ❌ Screw collar needs occasional hand-tightening in extreme cold
At C$45–C$65, this is the pick most anglers should default to unless they have a specific reason to go heavier or lighter.
4. HT Enterprises HTIC-1 — best for anglers who hate assembling gear in the cold
The one-piece, no-assembly build of the HT Enterprises HTIC-1 is the standout feature, meaning there’s no joint to seat, no collar to tighten, and nothing to fumble with while wearing thick gloves at minus 15°C (5°F). At 54 inches with a tempered steel chipping head, key specs interpreted: the solid one-piece shaft transmits more of your swing energy directly into the ice compared to jointed designs, since there’s no flex point absorbing impact. HT Enterprises has been a fixture in North American ice-fishing gear for decades, and here’s what to weigh: the tradeoff for that rigidity is a longer, less packable tool that won’t fit as neatly into a sled bag as the two-piece options. Aggregated reviewer sentiment on general retail platforms points to reliability as the main draw, with buyers citing years of use without the head loosening — a common failure mode on cheaper welded designs. What most buyers overlook is that one-piece chisels also mean one less point of failure when you’re out solo and can’t easily fix a stripped joint on the ice.
Pros:
- ✅ No assembly required, even with heavy gloves on
- ✅ Solid one-piece shaft transmits swing energy efficiently
- ✅ One less joint means one less potential failure point
Cons:
- ❌ Longer overall footprint, harder to pack in a small sled
- ❌ No adjustable length for shorter users
Priced around C$35–C$55, this is the simple, dependable option for anyone who values reliability over packability.
5. Thunderbay Heavy Duty Steel Chisel — best budget two-piece option
The alloy steel, two-piece build of the Thunderbay Heavy Duty Steel Chisel is the standout feature, giving buyers a packable design at a price point closer to the one-piece economy models. At 64 inches and about 8.1 pounds, key specs interpreted: this puts it among the longest bars in this roundup, which is a real advantage for testing ice several steps ahead before you commit your weight forward. Based on the spec comparison, Thunderbay positions this as an entry point into two-piece portability without the premium pricing of Jiffy or Eskimo’s chipper-head lines. Here’s what to weigh: reviewers on general retail platforms note solid value for occasional users, though feedback on the joint’s long-term durability under heavy daily chipping is less established than the more storied brands on this list, simply because the product has a shorter track record. The spec sheet won’t tell you this, but user reports suggest the extra length is genuinely useful for taller anglers who found 52-inch models left them bent over uncomfortably during long thickness checks.
Pros:
- ✅ Long 64-inch reach at a budget-friendly price
- ✅ Two-piece design packs down for storage and travel
- ✅ Good option for taller users who need extra reach
Cons:
- ❌ Shorter brand track record than legacy ice-fishing names
- ❌ Joint durability under heavy daily use is less proven
At roughly C$30–C$45, it’s a smart middle ground for anyone who wants two-piece convenience without paying premium prices.
6. Eskimo CH7 Economy Chisel — best entry-level pick for casual outings
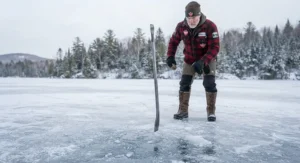
The lightweight, single-action alloy head on the Eskimo CH7 Economy Chisel is the standout feature, keeping the whole tool light enough for a quick, casual test without the arm burn of heavier chipper models. At 52.5 inches in a one-piece build, key specs interpreted: the lighter swing weight means less fatigue over a short walk to a nearby hole, though it also means less raw chipping force against thick or crusted ice. Based on the spec comparison, Eskimo’s economy line exists specifically for anglers who want a genuine spud bar without paying for chipping features they may not need on familiar, well-travelled lakes. A common theme in aggregated reviewer sentiment is that this chisel performs exactly as advertised for its price tier — a straightforward probing tool, not a heavy-duty ice breaker. What most buyers overlook about entry-level chisels like this one is that “economy” doesn’t mean unsafe; it means the tool is scaled to lighter-duty testing, which is still meaningfully safer than skipping the test altogether.
Pros:
- ✅ Lightweight design reduces arm fatigue on casual outings
- ✅ Simple one-piece build with nothing to assemble
- ✅ Genuinely affordable entry point into proper ice testing
Cons:
- ❌ Less chipping force against thick or crusted ice
- ❌ No packable two-piece option for smaller storage
At C$25–C$40, this is the tool for someone who wants to start testing ice properly without a big upfront investment.
7. Jiffy 3541 Mini Mille Lacs — best compact backup and travel chisel
The compact 30-inch, one-piece build of the Jiffy 3541 Mini Mille Lacs is the standout feature, making it small enough to strap to a backpack or stash inside an ice hut without taking up real space. Key specs interpreted: at roughly 3 pounds, this is by far the lightest tool in this roundup, which trades chipping power for genuine portability — it’s not meant to be your primary spud bar on a long walk across open ice, but rather a secondary or backup tool. Based on the spec comparison, this size shines for testing ice right around a fixed hut location, breaking thin skim ice off an existing hole, or as a lightweight option for younger or smaller anglers who find full-length bars unwieldy. Reviewers consistently note its usefulness as a “always in the sled” backup when the primary chisel gets left in the truck, and its compact steel head still holds up to repeated light chipping. Here’s what to weigh: don’t rely on this as your only ice-testing tool for a long approach walk, since its shorter reach means you’re standing closer to untested ice with each test point.
Pros:
- ✅ Compact 30-inch size fits in a backpack or sled bag
- ✅ Lightweight steel head handles light chipping duty well
- ✅ Great secondary tool for kids or tight ice-hut spaces
Cons:
- ❌ Shorter reach means standing closer to untested ice
- ❌ Not built for heavy chipping through thick slush
At C$25–C$35, it earns its spot as a smart companion tool rather than a standalone primary chisel.
How to Use an Ice Spud Bar: Step-by-Step Spud Bar Technique
Knowing how to use ice spud bar tools correctly comes down to a repeatable rhythm, not brute force. Here’s the core spud bar walking technique broken into practical steps you can start using on your very next trip.
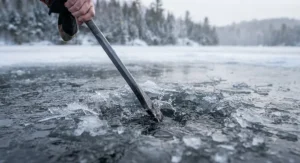
First, before you take a single step onto any frozen surface, strike the ice from solid shore ice or a known-safe point. Watch and listen: solid ice gives a sharp, high-pitched crack and the bar barely dents the surface after a few solid swings. Thin or unsafe ice sounds duller and the spud bar can punch through in one or two hits, sometimes with water welling up immediately — that’s your signal to stop, full stop.
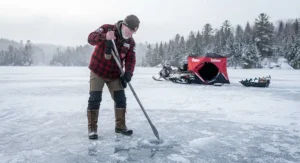
Second, adopt a walking rhythm: swing the bar firmly into the ice roughly one stride ahead of your lead foot before you commit your weight forward. This is the actual “spud bar walking” method experienced anglers use — test, then step, then test again, moving in a steady cadence rather than walking freely and testing occasionally. Never assume the ice ahead matches the ice you just tested; thickness can vary dramatically within a few metres, especially near inflows, pressure ridges, or areas with current underneath.
Third, pay attention to sound and feedback with every strike, not just whether the bar goes through. A solid thunk with minimal penetration means good ice. A soft, mushy response — even without breaking through — often signals honeycombed or rotting ice that looks solid on top but has lost its structural integrity underneath, a condition workplace ice-safety guidance specifically flags as unreliable even when thickness measurements look acceptable on paper.
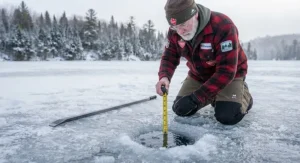
Finally, once you’ve confirmed a safe test point, use the bar’s tip to physically measure thickness where you’ve chipped through, comparing what you see against the ice thickness testing guide numbers in the section below before deciding whether to proceed further.
Real-World Scenarios: Matching the Right Spud Bar to Your Ice Season
Picture three different Canadians heading onto the ice this winter, because the “right” spud bar genuinely depends on who’s holding it. The first is a weekend angler in northern Ontario who drives to a familiar lake every Saturday from December through March, fishes near shore in a fixed spot, and values simplicity over specialized features — for this person, the Eskimo CH7 Economy Chisel or HT Enterprises HTIC-1 makes sense, since the ice is well-travelled, testing distances are short, and a lighter budget tool does the job without fuss.
The second scenario is a snowmobile-based ice angler in Manitoba or Saskatchewan who tows a sled loaded with a hut, auger, and gear across several kilometres of open lake to reach a favourite spot. Portability and packing size matter enormously here, which is exactly why the Jiffy Deluxe Mille Lacs Chisel or Rapala 62″ Two-Piece Chisel earns its keep — both break down small enough to strap onto a sled without adding meaningful bulk, while still offering enough length and durability for repeated thickness checks across a longer approach.
The third is an early-ice specialist chasing that first hard freeze in late November or early December, often on lakes known for wind-packed or layered ice conditions. This buyer needs raw chipping authority above all else, which points squarely at the Eskimo CH12 Triple-Action Chipper — its multi-faceted head is purpose-built for the kind of rough, uneven early ice that shrugs off lighter single-action bars. In every case, budget, distance travelled, and typical ice condition should drive the decision far more than brand loyalty alone.
Common Ice-Testing Problems (and How to Solve Them)
Even with a good spud bar in hand, a few recurring problems trip up otherwise careful anglers every season. Here’s how to solve the ones that come up most often.
Problem one: snow cover hiding weak spots. A fresh snowfall insulates ice and can mask thin or rotten sections that would otherwise be visible as grey or honeycombed patches. Solution: increase your testing frequency under snow cover, striking every stride rather than every few metres, since visual cues simply aren’t available.
Problem two: assuming uniform thickness across a whole lake. Ice near river mouths, narrows, or areas with underwater springs can be dramatically thinner than ice just a few hundred metres away. A government of Canada workplace safety bulletin on ice-covered water specifically flags current and inflow zones as high-risk areas requiring extra testing. Solution: treat every new zone of the lake as untested territory, especially anywhere current might be present underneath.
Problem three: a two-piece chisel loosening mid-season from repeated freeze-thaw cycling in a truck or shed. Solution: check the joint before every outing and store the tool somewhere it won’t experience extreme temperature swings between uses — a heated garage beats a cold truck bed for longevity.
Problem four: relying on a single test point near the access trail and assuming the rest of the day’s route is equally safe. Solution: keep testing throughout the day, particularly as afternoon sun or rising temperatures can weaken ice that was solid at dawn.
Problem five: undersized or worn-out chisel heads that no longer chip effectively, giving false confidence when the bar bounces off ice that’s actually borderline. Solution: inspect the blade edge each season and replace or upgrade to something like the Eskimo CH12 Triple-Action Chipper if your current tool no longer bites reliably.
How to Choose an Ice Spud Bar: 6 Things That Actually Matter
Here’s a numbered breakdown of what genuinely separates a good spud bar from a mediocre one, based on the spec comparison across all seven picks above.
- Length. Longer bars (60+ inches) let you test further ahead without crouching, which matters most for open-water walking rather than fixed-spot fishing.
- One-piece vs. two-piece design. One-piece bars are simpler and more rigid; two-piece bars pack smaller for snowmobile or backpack transport but introduce a joint that can loosen over time.
- Head design. Single-action flat heads are lighter and fine for familiar, well-travelled ice; multi-faceted or chipper-style heads handle rough, refrozen, or slush-layered ice far more effectively.
- Weight. A heavier bar chips harder per swing but tires your arm faster over a long testing walk — match weight to how far and how often you’ll actually be testing.
- Handle grip. Foam or rubberized grips matter more than they sound, since bare cold steel becomes genuinely painful to hold through a full outing at sub-zero temperatures.
- Blade sharpness and edge retention. A dull chisel gives false confidence by bouncing off ice it should be penetrating — check edge condition every season and sharpen or replace as needed.
Common Mistakes When Buying (and Using) an Ice Spud Bar
The single most common mistake is buying based on price alone rather than matching the tool to actual ice conditions and travel distance — a C$25 economy chisel is genuinely fine for short, familiar walks but a poor choice for anglers regularly crossing rough early ice. A second common mistake is treating the spud bar as a one-time purchase decision rather than a tool you inspect and maintain; a joint that loosened last March and was never re-tightened becomes a real problem the following December.
Another frequent error is buying the longest, heaviest chipper available “just to be safe” without considering that a lighter bar tested more frequently often provides better real-world safety than a heavy bar swung less often out of fatigue. Buyers also commonly skip checking whether a two-piece design uses a screw collar or a simpler pin-lock joint — the difference in long-term reliability, as reviewers across multiple retail platforms note, is meaningful after repeated freeze-thaw cycles.
Finally, plenty of buyers purchase a spud bar and then rarely use it, defeating the entire purpose. Reviewers consistently point out that habitual testing — every outing, every new zone of ice — matters more than which specific model sits in your sled.
Ice Spud Bar vs Power Ice Auger: Which Should You Buy First?
A spud bar and a power ice auger solve different problems, and conflating the two is a common early mistake for new ice anglers.
| Factor | Spud Bar | Power Auger |
|---|---|---|
| Primary purpose | Testing ice thickness and safety | Drilling fishing holes quickly |
| Typical cost (CAD) | C$25–C$130 | C$300–C$900+ |
| Learning curve | Minimal — swing and observe | Moderate — engine maintenance, blade care |
| Portability | Light, straps to a sled or pack | Bulkier, often requires a sled |
| Safety role | Primary — direct thickness feedback | Secondary — drilled holes confirm thickness after the fact |
| Best For | Every angler, every outing, as a first purchase | Anglers drilling multiple holes per session |
Looking at this comparison, the analysis is straightforward: a spud bar is the tool that keeps you from walking onto unsafe ice in the first place, while a power auger is purely a convenience tool for anglers who already know the ice is solid. Buy the spud bar first, every single time — even anglers who own a C$700 power auger still carry a spud bar for the walk out, because an auger only tells you about the exact spot you’ve already drilled, not the ground you’re crossing to get there.
Ice Thickness Testing Guide: What the Numbers Actually Mean
This is the ice thickness testing guide section that matters most, because knowing a number without context is genuinely dangerous. According to widely cited Canadian ice-safety guidance, clear blue or black ice at roughly 20 centimetres (about 8 inches) or more is generally considered strong enough for activities like skating, while grey or opaque white ice of the same measured thickness is meaningfully weaker and should be treated with far more caution.
Workplace safety guidance from the Canadian Centre for Occupational Health and Safety sets a firm floor: at least 10 centimetres (4 inches) of clear, good-quality ice for a single pedestrian moving across it, and at least 15 centimetres (6 inches) if you’ll be standing in one spot for an extended period, such as fishing from a fixed hole. Snowmobiles and light vehicles typically require substantially more — often in the 25 centimetre-plus range — and these numbers climb further for anything heavier.
Here’s the honest, uncomfortable truth every source agrees on, though: there is no such thing as perfectly, universally “safe” ice. Thickness is only one variable among several, alongside water current, recent temperature swings, snow cover insulating weak spots, and whether the ice formed in clean, still conditions or refroze after cracking and shifting. That guidance reinforces this directly: proper ice safety testing pairs a thickness measurement with ongoing visual and physical checks, not a one-time reading treated as a permanent checkbox before heading out.
Safe Ice Checking: Early Ice Safety Rules Every Canadian Should Know
Early ice safety deserves its own dedicated attention because the majority of Canadian cold-water incidents cluster in exactly this window — the transition weeks when lakes look frozen from shore but haven’t fully stabilized. National reporting notes that roughly a third of all Canadian drownings occur between October and May, driven directly by thin-ice and cold-water conditions during these shoulder-season months.
A few safe ice checking rules are worth committing to memory before your first outing each season. Never go alone if you can help it, and if you must, tell someone your route and expected return time. Avoid ice near moving water, river mouths, and narrows, where current thins ice unevenly and unpredictably even when the surrounding lake looks solid. Watch for colour: clear blue-black ice is strongest, white opaque ice is weaker, and any grey tone signals water content and should be avoided entirely. Carry your spud bar the entire walk, not just at the trailhead — thickness genuinely changes stride by stride in ways you cannot predict visually.
If you or someone nearby breaks through, the guidance is consistent across sources: don’t panic-climb at the exact break point, since that ice has already proven unreliable. Instead, reach forward onto solid ice, kick to bring your body horizontal, and crawl outward while distributing your weight, then roll rather than walk once you’re clear. Bystanders should never enter the water themselves — extend a pole, rope, or your own spud bar instead, and call for emergency help immediately.
Price Range & Value: What You Actually Get at Each Price Point
| Price Tier (CAD) | What You Typically Get | Example From This List |
|---|---|---|
| C$25–C$40 (Budget) | Lightweight one-piece bars, basic single-action heads | Eskimo CH7 Economy Chisel, Jiffy 3541 Mini Mille Lacs |
| C$40–C$70 (Mid-Range) | Two-piece packable designs, sturdier joints, longer reach | Rapala 62″ Two-Piece Chisel, HT Enterprises HTIC-1, Thunderbay Heavy Duty Steel Chisel |
| C$70–C$130 (Premium) | Multi-faceted or stepped heavy-duty steel heads, best edge retention | Eskimo CH12 Triple-Action Chipper, Jiffy Deluxe Mille Lacs Chisel |
The value analysis here is fairly intuitive once you see it laid out: budget tools genuinely suit casual, familiar-lake use, mid-range tools earn their keep through portability and reach for anglers travelling further, and premium tools pay off specifically when your local ice conditions are rough, layered, or unpredictable enough to demand real chipping authority. Spending more doesn’t automatically make you safer — matching the tool to your actual conditions does.
💬 Already own a favourite spud bar brand? Drop a comment below and help other Canadian anglers choose with confidence!
Features That Actually Matter (And Those That Don’t)
Cutting through the marketing noise: blade material and head design matter enormously, since a dull or poorly-shaped head gives false confidence by bouncing off ice it should penetrate. Joint quality on two-piece models matters just as much, because a loose or worn joint fails you exactly when you need reliable feedback most. Overall length matters for anyone walking any real distance across open ice, since shorter bars force you closer to untested ground with every step.
What matters far less than most first-time buyers assume: brand name recognition alone, decorative handle colours, and marginal weight differences of half a pound or so between comparable models. A basic economy chisel used every single outing beats a premium chipper left in the truck out of laziness or inconvenience. Focus your buying decision on length, head design, and joint reliability first — everything else is largely personal preference.
Frequently Asked Questions
❓ How do you use a spud bar to test ice thickness?
❓ What is a good spud bar for ice fishing in Canada?
❓ How thick should ice be before you walk on it?
❓ Is a spud bar or ice auger better for checking early ice?
❓ How much does an ice spud bar cost in Canada?
Conclusion
Learning how to use ice spud bar tools properly isn’t complicated, but it does demand consistency: test before every step, read the sound and feedback honestly, and never let a familiar lake talk you out of checking conditions that genuinely change season to season and even day to day. As CBC News has reported, thin-ice and cold-water conditions remain a leading factor in Canadian drownings each winter — a sobering reminder that a C$30 tool and thirty seconds of testing are cheap insurance against the worst-case outcome. Whether you land on a no-frills option like the Eskimo CH7 Economy Chisel or invest in serious chipping power with the Eskimo CH12 Triple-Action Chipper, the tool matters far less than the habit of actually using it every single time you step onto frozen water. Early ice safety, safe ice checking, and proper spud bar technique aren’t separate skills — they’re really just one habit, repeated consistently, that keeps Canadian ice seasons enjoyable instead of becoming a headline.
✨ Gear up properly this season, test every step, and get out there with confidence — the ice will still be there, and so should you.
Recommended for You
- Best Ice Spud Bar: 7 Top Picks for Ice Safety In 2026
- 7 Best Ice Safety Spikes for Winter Survival in 2026
- 7 Best Self Rescue Ice Picks That Could Save Your Life (2026)
Disclaimer: This article contains affiliate links. As an Amazon Associate, I earn from qualifying purchases. If you purchase products through these links, we may earn a small commission at no additional cost to you.
✨ Found this helpful? Share it with your friends! 💬🤗
