In This Article
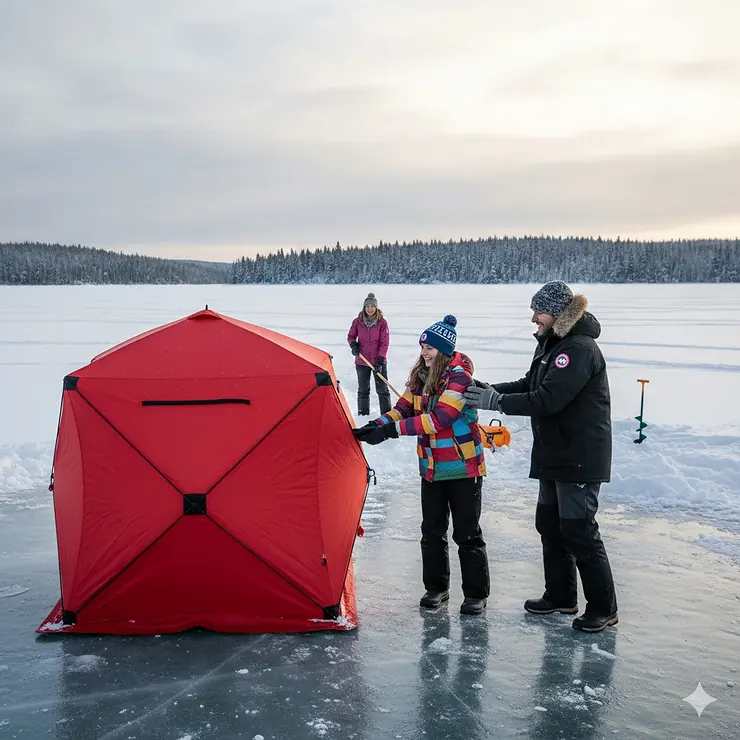
Picture this: hauling your gear across frozen ice in -20°C weather, wind howling. You’re ready to fish, but first you need to set up your pop up ice shelter. Do it wrong, and you’ll chase your tent across the ice. Do it right, and you’ll be fishing comfortably in under a minute.

Learning how to set up pop up ice shelter correctly isn’t just about convenience—it’s about safety and maximizing fishing time. According to Wikipedia’s ice fishing article, pop up shelters have revolutionised winter fishing by providing quick protection from the elements. In Canada, where temperatures plummet below -30°C across provinces like Alberta and Saskatchewan, a properly secured shelter makes the difference between success and danger.
Most pop up ice shelters feature hub-style designs that expand in 60 seconds, but the real skill lies in anchoring them securely. Whether battling Prairie winds on Lake Winnipeg or handling heavy snow in Quebec, this guide walks you through every step—from first practice setup to mastering the fastest ice shelter setup techniques used by experienced Canadian anglers.
Quick Comparison Table
| Shelter Model | Capacity | Area | Weight | Price (CAD) | Setup | Best For |
|---|---|---|---|---|---|---|
| Eskimo QuickFish 3i | 3 | 34 ft² | 34 lbs | $549.99 | 60s | Solo/small groups |
| Eskimo QuickFish 6HD | 6 | 71 ft² | 52 lbs | $749.99 | 60s | Families |
| VEVOR 8-Person Hub | 6-8 | 122 ft² | 58 lbs | $399-$499 | 90s | Large groups |
| Clam X-400 Thermal | 4 | 64 ft² | 41 lbs | $600-$700 | 60s | Cold weather |
| THUNDERBAY Ice Cube | 3 | 45 ft² | 38 lbs | $350-$450 | 75s | Budget |
| Otter Vortex Pro | 6-8 | 132 ft² | 73 lbs | $950-$1,100 | 90s | Premium |
| Piscifun 3-4 Person | 3-4 | 45 ft² | 35 lbs | $299-$379 | 60s | Best value |
💬 Just one click – help others make better buying decisions too!😊
✨ Don’t Miss These Exclusive Deals!
🔍 Take your ice fishing to the next level with these carefully selected shelters available in Canada. Click on any highlighted item to check current pricing and availability on Amazon.ca!
Top 7 Pop Up Ice Shelters: Expert Analysis
1. Eskimo QuickFish 3i – The Gold Standard
The Eskimo QuickFish 3i has earned its reputation across Canada as the original hub shelter that others try to match. This insulated 3-person shelter combines legendary reliability with genuine 60-second setup.
Key Specs: 34 sq ft fishable area • 600D IQ™ insulated fabric • 70″x70″ setup • 80″ ceiling • Self-tapping anchors included
Canadian Pricing: $549.99 CAD at SAIL
Customer Feedback: Ontario anglers praise wind resistance and heat retention at -25°C with minimal propane. Alberta users report excellent performance in Chinook winds.
✅ Pros: Genuine 60-second setup • 35% warmer than non-insulated • YKK freezeproof zippers
❌ Cons: Heavier at 34 lbs • Premium price
2. Eskimo QuickFish 6HD – Family Comfort
For families, the Eskimo QuickFish 6HD offers spacious comfort without sacrificing quick setup. The “No Trip” door eliminates frustration of stepping over sills with gear.
Key Specs: 71 sq ft fishable area • Fully insulated IQ™ fabric • No-trip door (zips from ice level) • 155″ setup dimensions
Canadian Pricing: $749.99 CAD
Customer Feedback: Quebec anglers appreciate room for children and gear. Manitoba fishers highlight stability in open-ice winds on lakes like Winnipeg.
✅ Pros: No-trip door is game-changing • Room for multiple anglers • Packable despite size
❌ Cons: 52 lbs requires team setup in wind • Higher price
3. VEVOR 8-Person Pop-Up – Budget-Friendly Space
The VEVOR 8-Person delivers remarkable fishable area at a fraction of premium costs, ideal for Canadian anglers watching budgets while needing serious space.
Key Specs: 122-177 sq ft area • 300D Oxford with thermal insulation • Hub-style with chimney vent • Anchors, ropes, carry bag included
Canadian Pricing: $399-$499 CAD
Customer Feedback: BC users report excellent value. Saskatchewan anglers use it for overnight trips, though zippers aren’t as cold-resistant as premium brands.
✅ Pros: Exceptional value for space • Good insulation • Large enough for overnight
❌ Cons: Heavier fabric complicates windy setup • Quality control varies
4. Clam X-400 Thermal – Extreme Cold Engineering
The Clam X-400 Thermal is purpose-built for brutal Canadian winters from Yukon to Labrador. Thermal insulation keeps temperatures stable when conditions deteriorate.
Key Specs: 64 sq ft area • 900D fabric with thermal layer • Reinforced hubs/poles • Deluxe oversized windows
Canadian Pricing: $600-$700 CAD
Customer Feedback: Northwest Territories anglers report -40°C success. Nova Scotia fishers appreciate coastal wind handling and superior condensation control.
✅ Pros: Best-in-class insulation • Virtually eliminates condensation • Minimal propane use
❌ Cons: Premium pricing • 41 lbs needs sturdy sled
5. THUNDERBAY Ice Cube – Canadian Design
The THUNDERBAY Ice Cube represents solid Canadian engineering at mid-range pricing. Popular across Prairies, combining durability with practical features.
Key Specs: 45 sq ft area • 300D polyester with blackout coating • Hub pop-up design • Complete anchoring system
Canadian Pricing: $350-$450 CAD
Customer Feedback: Prairie anglers praise windproof construction. Ontario users note blackout coating significantly improves underwater visibility and electronics viewing.
✅ Pros: Excellent value for Canadian conditions • Blackout aids visibility • Proven in harsh weather
❌ Cons: Less space than competitors • Heavier than advertised
6. Otter Vortex Pro Monster Lodge – Premium Choice
For serious anglers demanding the best, the Otter Vortex Pro delivers unmatched space, durability, and comfort for multi-day ice camping adventures.
Key Specs: 132 sq ft area • THERMALTEC 600D fabric • Aircraft-grade aluminum frame • Fits 6-8 with cots
Canadian Pricing: $950-$1,100 CAD
Customer Feedback: Northern Ontario guides use these for operations, praising week-long remote use capability. Alberta anglers report frame handles extreme wind without flexing.
✅ Pros: Commercial-grade construction • Room for overnight bunks • Industry-leading thermal protection
❌ Cons: Significant investment • 73 lbs requires transport planning
7. Piscifun 3-4 Person – Best Value
The Piscifun 3-4 Person hits the sweet spot between affordability and functionality. Increasingly popular among Canadians wanting reliable performance without premium pricing.
Key Specs: 45 sq ft area • 300D Oxford with 80g thermal insulation • Two-door design with TPU windows • Rated to -31°F/-35°C
Canadian Pricing: $299-$379 CAD
Customer Feedback: New Brunswick anglers appreciate easy cold-weather assembly. Manitoba users report good open-lake wind performance with excellent ventilation control.
✅ Pros: Outstanding value • Good thermal performance for price • Lightweight at 35 lbs
❌ Cons: Windows could be more durable • Zippers need care in extreme cold
Shelter Types Comparison
| Feature | Pop-Up Hub | Flip-Over | Permanent |
|---|---|---|---|
| Setup Time | 60-90 seconds | 30-60 seconds | N/A (seasonal) |
| Interior Space | 30-130 sq ft | 15-40 sq ft | Unlimited |
| Wind Resistance | Moderate | Excellent | Excellent |
| Portability | Excellent | Good | Poor |
| Cost | $300-$1,100 | $400-$1,500 | $2,000+ |
| Best Use | Groups, fishing multiple spots | Solo, mobile fishing | Season-long stays |
What Is How to Set Up Pop Up Ice Shelter?
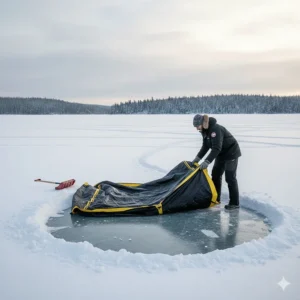
A pop up ice shelter is a portable hub-style structure designed to provide protection from wind, snow, and cold while ice fishing. Unlike flip-over shelters attached to sleds, pop ups utilize interconnected poles and hubs that “pop” into freestanding structures within 60-90 seconds.
The setup involves releasing the shelter from packed configuration, allowing pre-assembled hubs to expand, securing with anchors, and adjusting tension straps for stability. Modern shelters accommodate 1-8 anglers with insulated walls, removable windows, and door configurations for ice conditions.
Canadian ice fishing regulations require proper identification and removal dates in many provinces, making portable pop-ups ideal for anglers fishing multiple locations.
Pop Up Ice Tent Assembly Tips: Master the Basics
Unpack and Practice at Home First
Never attempt your first pop up ice tent assembly tips on frozen water. Set up in your garage three times before heading out. Most Canadian anglers who struggle with setup skipped this critical step. Spread components, verify against packing list, and learn how hubs lock/release. Manufacturing errors happen—discovering missing anchors at home beats finding out 500 metres offshore in -25°C wind.
Position for Wind Direction
Before setup, identify wind direction. Position doors perpendicular to prevailing wind—never parallel. This prevents wind blowing through openings and eases entry/exit. On Canadian lakes, check Environment Canada forecasts for direction changes. What starts as light westerly can become strong northerly by afternoon.
Use the Two-Person Technique in Wind
While shelters advertise “solo setup,” Canadian wind often demands two people. One holds the upwind side while the other extends downwind. This prevents tumbling across ice—common mistakes that damage hubs. For solo setup, anchor upwind corner first, creating a pivot point before full extension.
Pre-Stage Your Anchors
Thread tie-down straps through grommets and attach anchors before leaving home. When you arrive, your system is ready—no fumbling with frozen straps. Manitoba fishers colour-code anchors (upwind = red, downwind = blue) for instant identification.
Fastest Ice Shelter Setup: Pro Techniques
The “Corner Lock” Method
Professional guides across Northern Canada use this for fastest ice shelter setup in wind. Position one corner facing upwind. Immediately drive an anchor through corner grommet before full extension. This creates a pivot point—shelter can’t blow away during setup. Extend adjacent walls, anchor them, then complete remaining walls. Time with practice: 45-50 seconds in 40 km/h winds.
Drill Holes First
Saskatchewan tournament anglers drill anchor holes before unpacking. Position holes where anchor points will be (4-8 holes matching shelter dimensions). When you extend the shelter, anchors drop into pre-drilled holes. Cuts setup time 20-30 seconds and ensures perfect placement.
Use Cordless Drill Anchors
Self-tapping anchors work but require effort in thick ice (60+ cm common in Canadian winters). Cordless drill adapters power anchors into ice in seconds versus minutes. The $30-$50 CAD investment pays for itself. Keep batteries warm in inside pocket—cold batteries lose 40-60% capacity.
Ice Shelter Anchoring Techniques: Secure Your Setup
The 8-Point System
Professional techniques employ 8-point anchoring: four at floor corners plus four mid-wall tie-downs. This distributes wind load across eight points versus four, significantly increasing stability. In winds exceeding 30 km/h—common on Prairie lakes—this prevents collapse or movement.
Optimal Angle and Depth
Drive anchors at 45-degree angle away from shelter, not straight down. Angled creates pulling resistance rather than lifting force. In ice 30+ cm thick (typical mid-winter), anchors should penetrate 15-20 cm minimum. Test each anchor with firm pulling before trusting it.
Ice Thickness Requirements
Canadian safety guidelines recommend minimum 10 cm for walking, but shelter anchoring needs different considerations. Ice 15-20 cm thick holds anchors adequately for small shelters in moderate wind. Large shelters (6-8 person) or high-wind needs 25+ cm thickness. Verify at exact setup location—ice forms unevenly.
Tie-Down Straps
Beyond basic anchors, attach mid-wall straps to create outward tension on all four walls simultaneously. This prevents fabric billowing and reduces hub stress. In extreme winds (50+ km/h), add guy lines attached to anchors 2-3 metres from shelter.
✨ Don’t Miss These Exclusive Deals!
🔍 Upgrade your ice fishing setup with professional-grade equipment available in Canada. Click on any highlighted shelter above to check current Amazon.ca pricing and availability. These proven Canadian winter performers will transform your ice fishing experience!

Pop Up Shelter in High Winds: Special Techniques
Pre-Setup Assessment
Before attempting pop up shelter in high winds (25+ km/h sustained), assess conditions realistically. Check Environment Canada for wind speed, gusts, direction changes. Above 50 km/h makes setup dangerous. Between 25-40 km/h, special methods work; above 40 km/h, consider postponing or using natural windbreaks.
Weighted Base Method
Saskatchewan and Alberta anglers use weighted bases on windswept lakes. Position your loaded sled upwind where shelter extends. Extend shelter using sled as windbreak and temporary anchor. Once two walls are secure, complete normally. Sled weight (50-80 lbs loaded) prevents wind catch during critical setup moments.
Natural Windbreak Use
Canadian lakes feature pressure ridges, snow drifts, or vegetation creating windbreaks. Position shelter 3-5 metres behind features on lee side. The windbreak disrupts wind flow, creating calmer air pockets. Works excellently on Prairies where pressure ridges form throughout winter.
Progressive Extension
Rather than popping entire shelter at once, use progressive extension. Extend one wall, anchor it, then proceed to next. Start upwind wall, anchor completely, extend perpendicular walls with anchoring, finally downwind wall. Takes longer (2-3 minutes vs 60 seconds) but prevents wind damage.
Ice Tent Setup Mistakes: What to Avoid
Skipping Home Practice
The most common ice tent setup mistakes stem from inexperience. Attempting first setup in -25°C wind 500 metres offshore creates frustration and equipment damage. Practice at home three times minimum. This familiarity prevents the #1 mistake costing Canadian anglers time and safety.
Anchoring to Weak Ice
Ice forms unevenly due to current, depth, and springs. Testing at boat launch doesn’t guarantee thickness 200 metres out. Drill test holes at setup location. Ice should be 15 cm minimum, preferably 20+ cm. Cloudy white or honeycombed ice indicates weakness regardless of thickness.
Ignoring Wind Direction
Setting up with doors parallel to wind reduces heat retention and complicates entry/exit. Position doors perpendicular to prevailing wind. Check forecasts for direction changes—northwest wind may shift northeast by afternoon.
Under-Anchoring
Budget shelters include four anchors. This suffices in calm conditions but fails in typical Canadian wind. Using only four when conditions warrant eight constitutes dangerous negligence. Additional anchors cost $20-$40 CAD versus $300-$1,000 replacing damaged shelters.
Leaving Shelter Unattended
Canadian weather changes rapidly. Calm mornings become 40 km/h afternoons. Check shelter every 30-60 minutes. Verify anchors haven’t loosened, adjust guy lines if wind increases. Many insurance claims result from unattended shelters blowing away.
Beginner Ice Shelter Guide: Complete First Setup
Selecting Setup Location
Choose location with verified ice thickness (minimum 15 cm), protection from wind if possible, distance from ice roads/trails, and compliance with regulations. Ontario regulations provide guidance on where shelters can be placed.
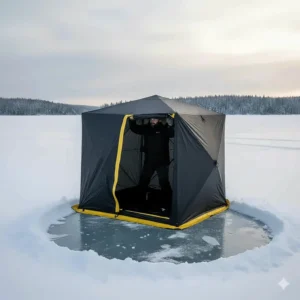
Step-by-Step Process
1. Clear Area: Remove snow from area 1-2 metres larger than shelter dimensions down to ice level.
2. Mark Corners: Use auger to pre-drill anchor holes at four corners plus mid-wall positions if using 8-point anchoring.
3. Lay Flat: Remove shelter from bag, lay flat on cleared ice, doors perpendicular to wind.
4. Extend Gradually: If partnered, one holds upwind corner while other extends. Solo: anchor upwind corner first.
5. Secure Corners: As each corner extends, immediately anchor it. Don’t wait—wind catches loose corners.
6. Add Tie-Downs: Once basic structure is up with four corners secure, add mid-wall anchors if needed.
7. Verify Tension: Fabric should be taut but not overly tight. Loose billows in wind; over-tight stresses hubs.
8. Test Doors: Ensure zippers operate smoothly. Apply lubricant if needed.
9. Arrange Interior: Position heater safely, place gear, drill fishing holes.
10. Walk-Around Check: Verify all anchors fully inserted at proper angles, straps have equal tension, shelter sits level.
Value vs. Features Analysis
| Price Range (CAD) | Features | Best For | Compromises |
|---|---|---|---|
| Under $400 | Basic insulation, standard fabrics, 4-point anchoring | Occasional users, budget conscious | Lighter fabrics, fewer features, shorter lifespan |
| $400-$700 | Good insulation, reinforced hubs, quality zippers | Regular anglers | Mid-range durability, adequate for most conditions |
| $700-$1,100 | Premium insulation, commercial-grade materials, advanced features | Serious anglers, guides, frequent use | Higher upfront cost justified by longevity |

Frequently Asked Questions
❓ How long does it take to set up a pop up ice shelter?
❓ What ice thickness do I need to safely set up a shelter in Canada?
❓ Can you set up a pop up shelter alone in windy conditions?
❓ Do I need to register my pop up ice shelter in Canada?
❓ What's the best way to anchor on thick Canadian ice?
Conclusion: Master Your Setup
Learning how to set up pop up ice shelter correctly transforms your Canadian ice fishing from frustrating to phenomenal. The difference between fumbling in -30°C for 15 minutes versus confidently deploying in 60 seconds comes from practice, proper technique, and understanding our climate’s challenges.
The key takeaways:
Practice at home. Set up three times in your driveway before ice trips. Muscle memory developed at home pays dividends in harsh conditions.
Proper anchoring isn’t optional. In Canadian conditions, under-anchoring is dangerous. Use 8-point systems in high winds, angle anchors correctly, verify holding strength.
Respect our weather. Monitor Environment Canada forecasts, adjust for conditions, know when to postpone.
Choose quality. Budget shelters work for occasional mild-condition use, but serious Canadian fishing demands insulated, reinforced shelters designed for our climate. The Eskimo QuickFish 3i or Piscifun 3-4 Person represent excellent investments.
Whether chasing walleye on Lake Winnipeg, perch on Simcoe, or trout in Alberta’s mountains, a properly set up shelter makes all the difference. Your perfectly deployed shelter waits—warm, secure, ready in under 60 seconds.
✨ Don’t Miss These Exclusive Deals!
🔍 Ready to upgrade your ice fishing experience? Click on any of the highlighted shelters above to check current Amazon.ca pricing and availability. Transform your winter fishing with equipment designed for Canadian conditions!
Recommended for You
- 7 Best Pop Up Ice Fishing Shelters 2026
- 7 Best Ice Auger for Thick Ice Canada 2026
- 7 Quietest Electric Ice Augers Canada 2026 – Silent Fishing
Disclaimer: This article contains affiliate links to Amazon.ca. If you purchase products through these links, we may earn a small commission at no additional cost to you.
✨ Found this helpful? Share it with your friends! 💬🤗